Fortigate Static NAT Configuration
We will give an example on how to configure static NAT in Fortigate. In this example, we use the WAN 1 Interface of the FortiGate unit is connected to the Internet and the Internal interface is connected to the DMZ network. We need to access one of the DMZ servers which is 10.0.10.100 from the Internet for any services. (Please note that this example is using v4.0,build0535,120511 (MR3 Patch 7) ).
Let say the Internet IP address blocks that we get from the Internet Service Provider are 200.200.100.0/24 and we want to NAT the IP Address 200.200.100.100 into our web server IP Address 10.0.10.100.
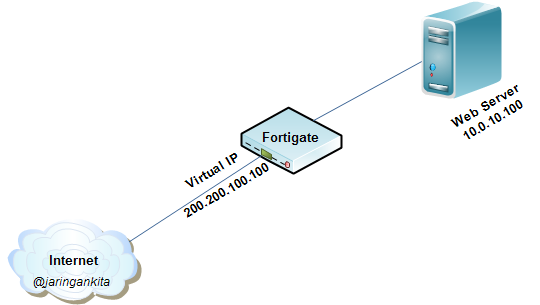
Example Topology
Before we can access the NAT IP Address, we have to create a Virtual IP using the following steps:
- Go to Firewall Objects > Virtual IP > Virtual IP.
- Select Create New.
- Complete the following and select OK.
- Name : Web_Server_NAT (can be filled with any names)
- External Interface : wan1
- Type : Static NAT
- External IP Address/Range: 200.200.100.100
- Mapped IP Address/Range: 10.0.10.100
- No Port Forwarding Selected
After finishing create the Virtual IP then Create the Policy using the following steps:
- Go to Policy> Policy > Policy and select Create New
- Complete the following and select OK.
- Here is the form:
- Source Interface/Zone: wan1
- Source Address: All
- Destination Interface/Zone: Internal
- Destination Address: Web_Server_NAT (select from the one we have created on above steps)
- Schedule : always
- Service : ANY
- Action: ACCEPT
- Select the NAT option
- Select OK
After completing all the steps above then test using ping to 200.200.100.100 from Internet and it should be success.
Article Fortigate Static NAT Configuration is written by JK.
(JK)
Dear Team,
I Was done configuration as per above but public IP is not pinging from internet but showing public IP when i was checking on same system through what is my IP. Please suggest to resolve issue ASAP.
hi, please kindly troubleshoot via Forward Log to see what happen